THE PACKAGING JOURNAL
How to Package a Gift Box: Step-by-Step Guide & Packaging Ideas
Choose a fitted presentation box, secure the contents, finish the reveal and plan separate outer protection when the gift will be shipped.
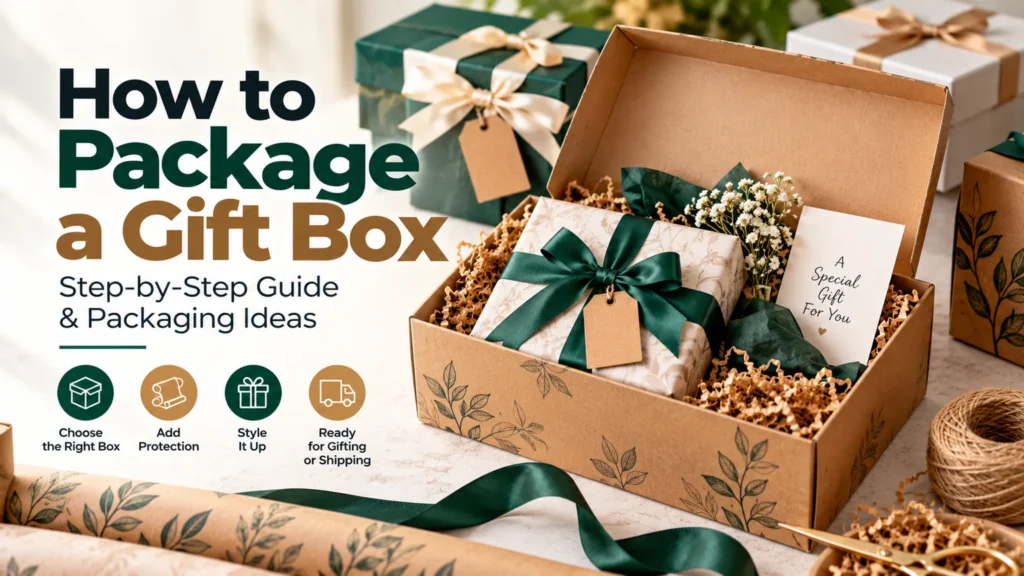
To package a gift box, choose a presentation box that fits the complete contents, build a supportive base, arrange and secure the items, then finish the interior neatly. Wrap the outside only if it adds to the presentation. If the gift will travel by parcel, assess a suitable outer shipping carton and cushioning separately.
A good arrangement should look intentional when the lid opens and remain practical to unpack. The ribbon and tissue come after the fit, support and closure decisions.
What You Need Before You Start
- A presentation box sized around the complete gift arrangement.
- Tissue or paper for the interior finish.
- Suitable cushioning, inserts or dividers for support.
- Appropriate tape or adhesive, plus an optional ribbon, tag or card.
- An outer carton and protective packing materials if shipping.
Keep food, cosmetics, candles and other sensitive products in their required primary or retail packaging. The gift box organizes and presents those products; it does not replace their own packaging requirements.
How to Package a Gift Box Step by Step
1. Choose the Right Gift Box
Lay out the items with any retail cartons, wraps and proposed supports. Measure that arrangement before choosing inside dimensions. Allow room to load and remove the contents, without creating large empty gaps.
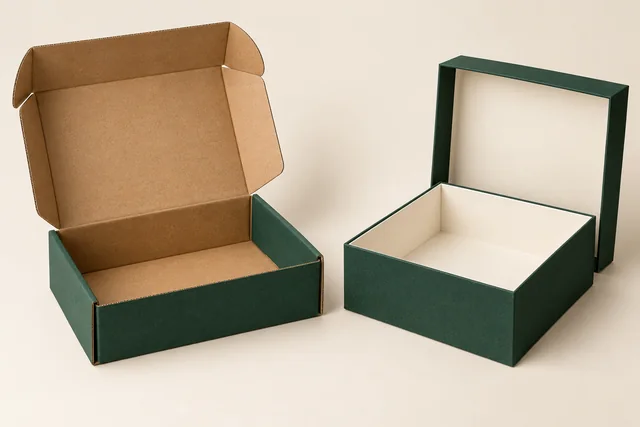
Rigid boxes can provide a substantial presentation, while folding structures may suit a simpler packout. A separate lid, hinged closure or magnetic-style structure changes how the recipient opens the gift. Check the actual construction rather than judging only the closed appearance.
2. Create a Stable Base
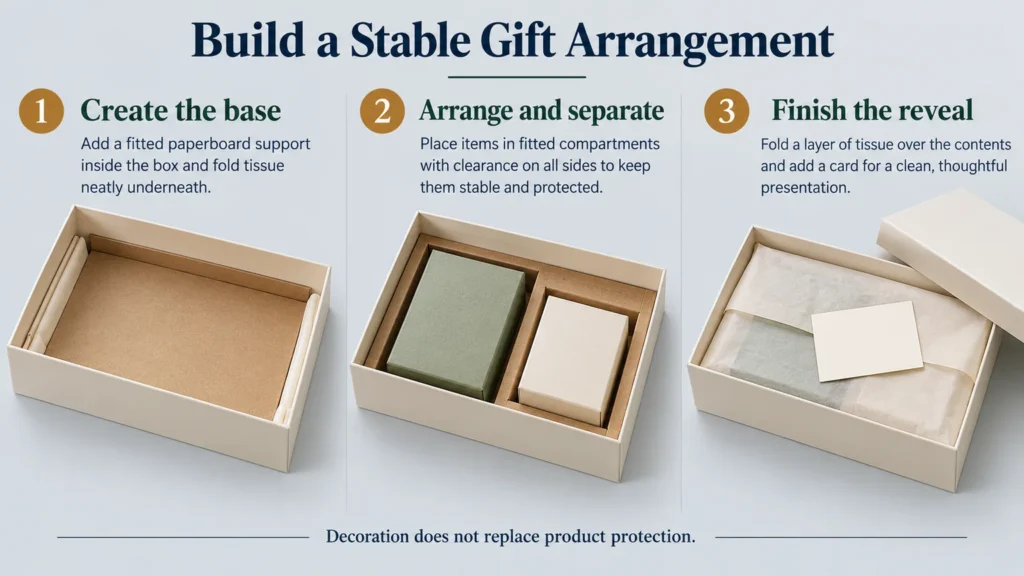
Start with a base that supports the contents at the intended height. A fitted insert can hold a product in position; appropriately selected cushioning can support another arrangement. Tissue can line the box and create a clean reveal, but it is not automatically a protective base.
Keep the surface reasonably level. A mound of loose filler may look full while letting a heavy object settle or tip. Use only the amount needed for the specific role.
3. Arrange the Main Gift and Smaller Items
Place the main visual item first, then locate smaller items where they can be seen and removed. Keep heavier pieces supported low in the arrangement, rather than resting them on delicate products.
For a small corporate gift set, a boxed notebook and a smaller accessory carton might sit in separate compartments. Check that neither can slide into the other and that the recipient has room to grip both. A pleasing layout should not depend on everything remaining perfectly upright.
4. Secure Empty Space and Prevent Movement
Use a fitted support, divider or suitable cushioning to control movement. Separate fragile items and protect vulnerable edges. Do not assume decorative crinkle paper or shredded paper is enough for every product.
Review the complete arrangement under representative handling. Product weight, geometry, fragility and delivery method determine the protection needed. If an insert fits tightly, check that removal does not require pulling on a lid, cord or delicate part.
5. Finish the Interior With Tissue or a Card
Fold tissue neatly across the arrangement or around an already protected item. Leave enough room for the lid to close without compressing the contents. Place a card where it can be found without digging through filler.
A single coordinated tissue color and a short message can make the reveal feel considered. Avoid adding several decorative layers that obscure the gift or make the contents difficult to reach.
6. Close and Wrap the Box if Needed
Close the lid before adding ribbon or paper. It should sit as intended without bulging, catching tissue or pressing on the products. A ribbon should decorate or help hold a suitable lid, not compensate for a poorly fitted pack.
A finished presentation box may need only a tag or sleeve. If you want a wrapped gift box, use smooth paper folds and keep adhesive away from visible display panels. Check that the recipient can still identify how to open it.
7. Add Outer Protection if the Gift Will Be Shipped
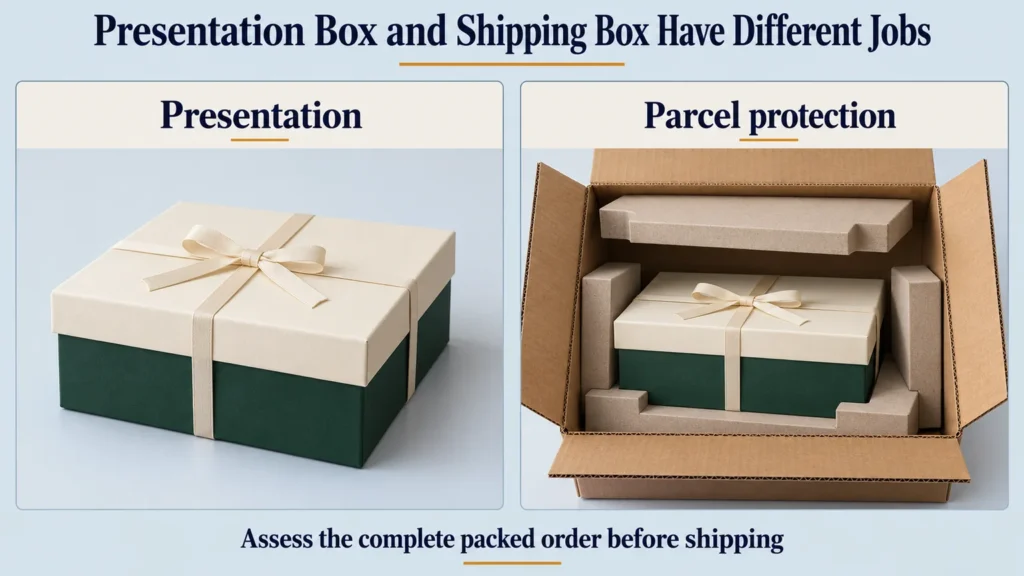
Treat the presentation box and parcel enclosure as separate decisions. A decorative box can be scuffed or crushed during handling even when it feels substantial. Use an appropriate outer carton and suitable cushioning around the inner box where required.
FedEx’s gift-shipping guidance emphasizes a sturdy box and room for cushioning. Confirm the current guidance for the actual contents and service, then assess the complete packed order. A closed gift box alone is not proof of shipping suitability.
How to Wrap a Gift Box Neatly
Check the paper around the closed box before cutting. It should cover the main seam with a modest overlap and leave enough at each end for clean folds. Excess paper creates bulky corners; too little leaves gaps.
Place the main seam on a less visible face. Keep the paper comfortably snug, smooth the panels, then fold the ends into tidy flaps. Use small, deliberate tape placements. Test adhesive on the actual surface if marks or finish damage are a concern.
For two-piece boxes, wrap the lid and base separately when you want the lid to lift off without tearing the paper. Keep paper and tape from building up inside the fit area. Recheck the wrapped lid on the base before adding a ribbon.
When wrapping a large gift box, work on a clear surface and support the box as you turn it. Avoid using the paper to lift a heavy pack. If full wrapping makes opening awkward, a sleeve or ribbon may be the more practical finish.
Gift Box Packaging Ideas for a More Considered Presentation
Kraft box styles can work with a restrained printed mark and one coordinated tissue color. A different surface may suit a more graphic design; neither appearance establishes environmental performance.
A branded sleeve or seasonal band can change the message while keeping the core box consistent. Keep important information readable and avoid hiding the opening. For gift collections, custom inserts can create a repeated layout across several items.
A presentation mailer box offers another opening format, but still needs a product-specific shipping assessment. Review board, artwork and finishes together using the materials and finishes guide. Confirm any finish against the actual stock and production process.
Common Gift Box Packaging Mistakes
An oversized box often leads to unnecessary filler; a cramped one can press on products or make removal difficult. Loose heavy items, fragile pieces touching and untested insert pockets are other problems that decoration cannot solve.
Also check the outside. Bulging paper, visible tape across the main panel and an over-tight ribbon can undermine a neat interior. Before mailing, review the outer shipper rather than assuming the decorative box is ready for parcel handling.
Quick Gift Box Packaging Checklist
- Complete item arrangement, packed weight and inside fit checked.
- Fragile areas supported and items separated where needed.
- Contents accessible without pulling on delicate parts.
- Tissue, card and lid close without pressure.
- Wrapping, ribbon and branding leave a clear opening route.
- Outer carton, cushioning and sample review considered for shipping.
Frequently Asked Questions
How do you pack a gift box nicely?
Use a fitted arrangement, place the main gift deliberately, support smaller items and finish with a clean tissue fold or card. Keep removal straightforward.
Do you need to wrap a gift box?
No. A finished presentation box may need only a ribbon, tag or sleeve. Use wrapping when it improves the intended reveal.
How do you wrap a gift box with a separate lid?
Wrap the lid and base separately, keeping excess paper out of the fit area. Check that the lid still opens and closes comfortably.
How do you package a gift box for shipping?
Assess the protected contents and inner presentation box together, then use a suitable outer carton and cushioning for the product and delivery method.
What filler should you use in a gift box?
Choose by purpose. Tissue can improve presentation; suitable cushioning or fitted supports address movement and protection. Decorative filler alone may not suit fragile contents.
How do you stop items moving inside?
Use a tested insert, divider or cushioning arrangement suited to the contents. Control gaps while leaving space to remove each item.
Plan the Reveal and the Journey
Knowing how to package a gift box means planning both the recipient’s opening and the handling before it arrives. Fit and support come first; tissue, wrapping and ribbon complete the presentation.
For a custom gift-box project, share your packaging brief with item dimensions, quantities, artwork and delivery plans. Include the full arrangement and any insert or sample needs so the structure can be reviewed around the real contents.
KEEP EXPLORING