
THE PACKAGING JOURNAL
How to Measure a Box Correctly: Length, Width & Height Guide
Measure a box correctly using length, width and height. Follow practical steps for inside dimensions, shipping measurements and common mistakes.
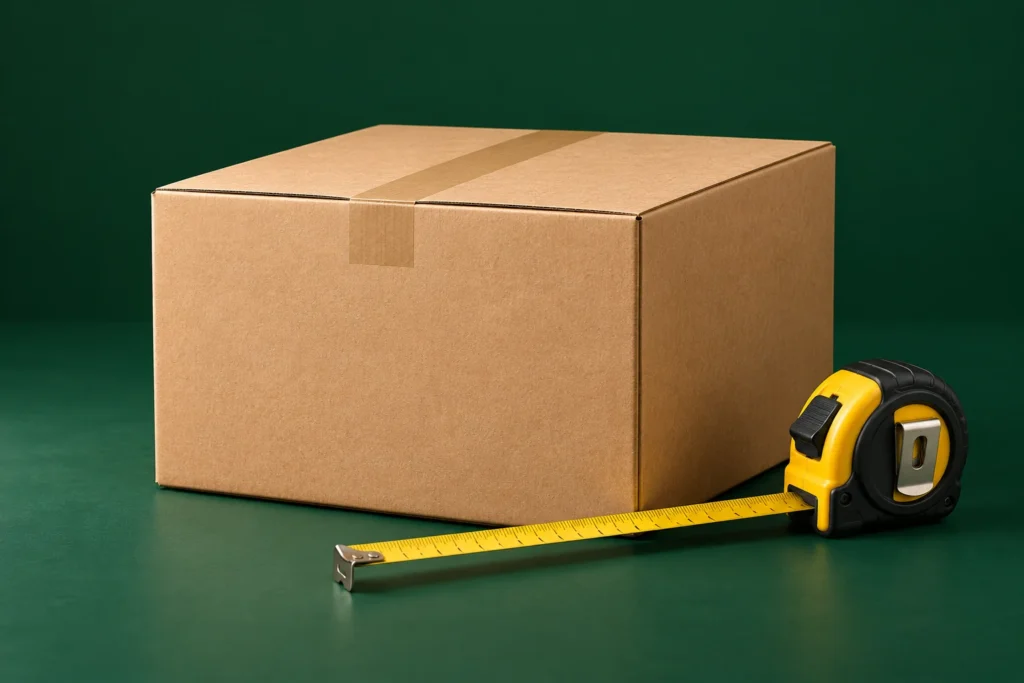
Here’s how to measure a box: assemble it in its intended position, then measure its length, width and height. Write the result in that order, with the unit included: 12 × 8 × 6 inches (L × W × H), for example.
Before you pick up the tape, decide which measurements you need. Measure the usable space inside when checking product fit. For a parcel you are sending, measure the outside of the finished, packed package. Confusing those two sets of numbers can leave you with a box that is too tight or shipping information that does not match the parcel.
What Are Box Dimensions?
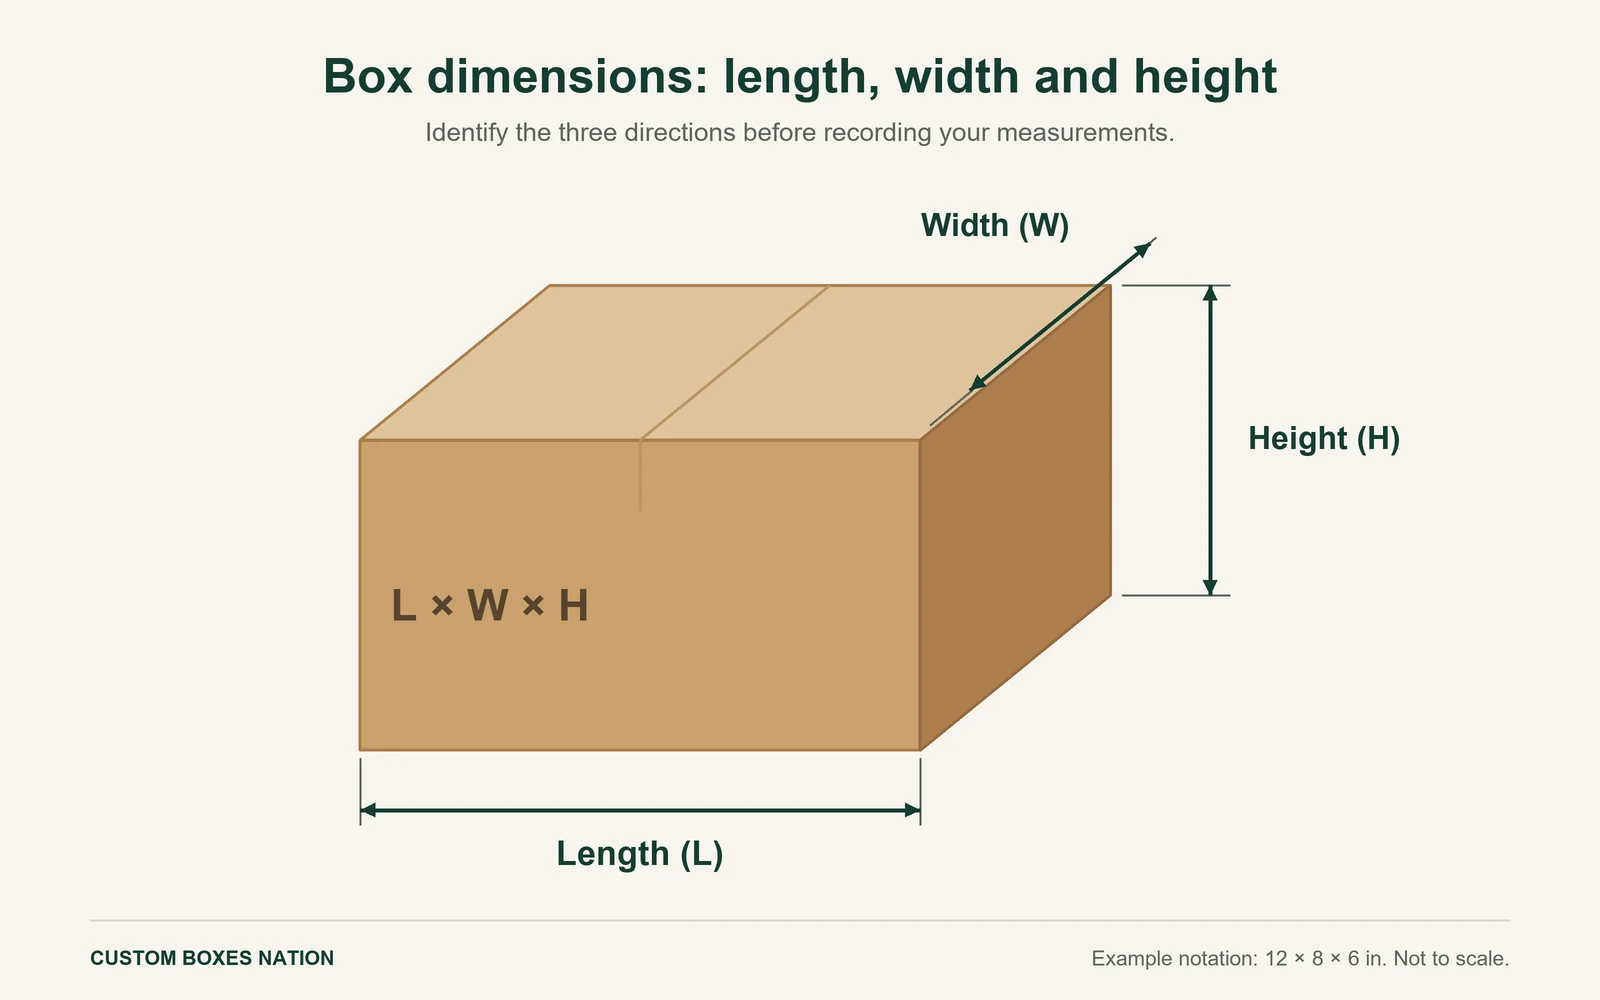
Box dimensions describe three distances: length, width and height. Together, they tell someone the shape and size of a rectangular box. A single measurement, such as “12-inch box,” leaves the other two distances unknown.
For a standard box with its opening facing upward, length and width run across the base. Height runs from the bottom to the top. Keep the box in that position while identifying all three measurements.
The numbers do not tell you the material, board thickness or whether the size is internal or external. Record those details separately when they affect your decision.
What Is the Correct Box Dimension Order?
The usual packaging notation is Length × Width × Height, abbreviated L × W × H. In an ordinary top-opening rectangular carton, length is the longer edge of the base, width is the shorter base edge, and height is the vertical distance to the top.
Height does not have to be the smallest number. A tall presentation box can be higher than either base measurement. If the base is square, length and width are equal.
Some suppliers use “depth” for the third measurement or label a particular construction differently. Follow the labels on the supplier’s drawing, especially for mailers, sleeves and boxes with a hinged lid. If there is any doubt, add a sketch showing the opening and each measured direction.
How to Measure a Box Step by Step
Use a ruler or measuring tape with readable markings. A rigid ruler helps with small boxes; a tape is easier for larger cartons. Put the box on a flat surface, square its corners and assemble the base properly. Do not include loose, unfolded flaps in the height.
For the following steps, assume you are checking the inside of a standard top-opening box.
1. Measure the Length
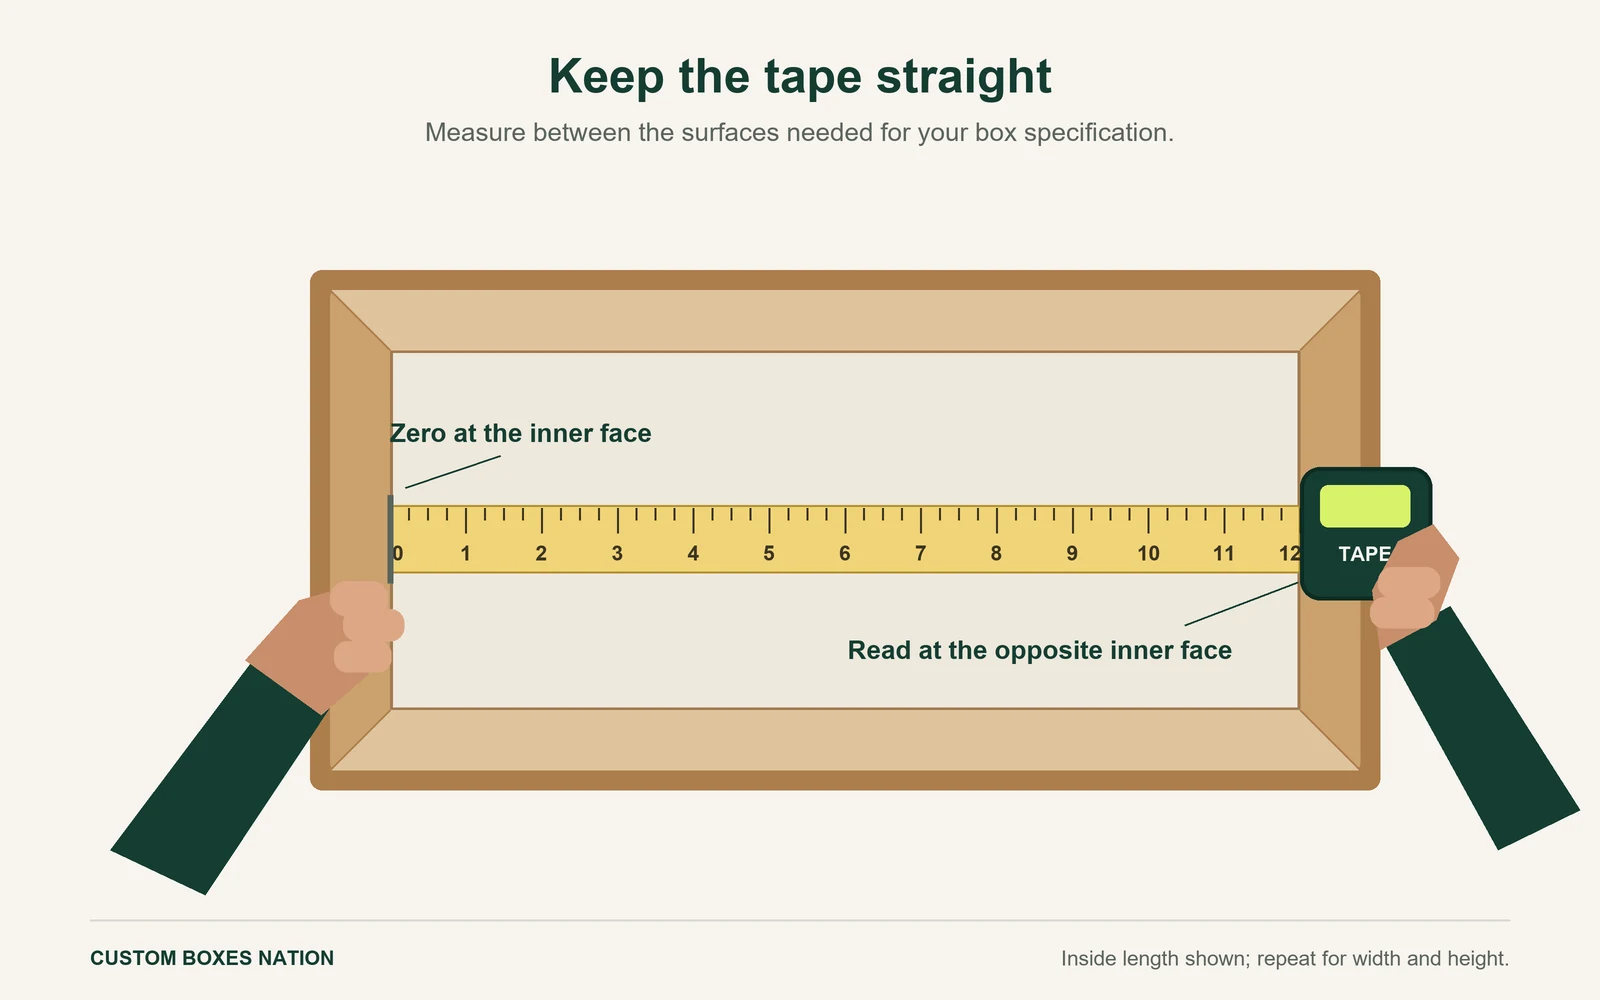
Find the longer edge of the base. Measure straight between the two opposing inner faces, keeping the tape parallel to that edge. Do not run it diagonally across the opening.
Check the usable space where the product will sit. A folded corner or an insert can reduce the clearance even if the opening looks wide enough. In this example, the inside length is 12 inches.
2. Measure the Width
Measure across the shorter base direction, again from inner face to inner face. Keep the tape straight and level rather than letting it bow into the box.
The example width is 8 inches. If the box narrows toward the base, check the smaller usable area too; the widest point at the top may not describe the space available to your product.
3. Measure the Height
Measure vertically from the inside base to the underside of the lid in its normal closed position. Do not measure to the ends of open flaps. If access is awkward, mark the intended closing level or use a rigid ruler, then confirm the fit with the lid closed.
Here, the usable height is 6 inches. The lid should close normally without pushing the contents down or bowing outward.
4. Record the Measurements as Length × Width × Height
Write 12 × 8 × 6 inches, inside dimensions. Labeling the measurement type now avoids confusion when the same box is later measured from the outside.
Take a second reading before sending the numbers. If the readings differ, check for a tilted ruler, a bent wall or a tape hook that moved away from the starting edge.
How to Write the Dimensions of a Box
Use a consistent order and include the unit. These are clear examples:
- 12 × 8 × 6 in (L × W × H), inside dimensions
- 300 × 200 × 150 mm (L × W × H), outside dimensions
Do not mix inches and millimeters in one set of dimensions. If you convert measurements, retain the original readings and label the converted values. One inch equals 25.4 millimeters.
Keep fractions or decimals in your working notes. For instance, write 12¼ inches or 12.25 inches rather than dropping the fraction. Apply any required rounding when entering a specific supplier’s or carrier’s form, using that service’s instructions.
How to Read Box Dimensions
A listing of 12 × 8 × 6 inches (L × W × H) describes a box with a 12-inch length, an 8-inch width and a 6-inch height. It does not mean every product shorter than 12 inches will fit.
A product might fit along the length but catch at the opening, sit too high once wrapped, or leave no room for an insert. Compare each product measurement with its corresponding usable box dimension. Check the listing for “inside,” “outside,” “internal” or “external” before relying on the numbers.
Multiplying 12 × 8 × 6 gives a rectangular volume of 576 cubic inches. That describes volume, not product fit or a shipping price. The three individual measurements still matter.
Inside vs. Outside Box Measurements
Inside dimensions describe the usable space within the box. They help you decide whether the product, wrapping and inserts will fit. For custom packaging, confirm whether the supplier wants internal dimensions, product dimensions or another specification.
Outside dimensions describe the box’s external size. They matter when checking a shelf, delivery bag, storage space or finished shipping package.
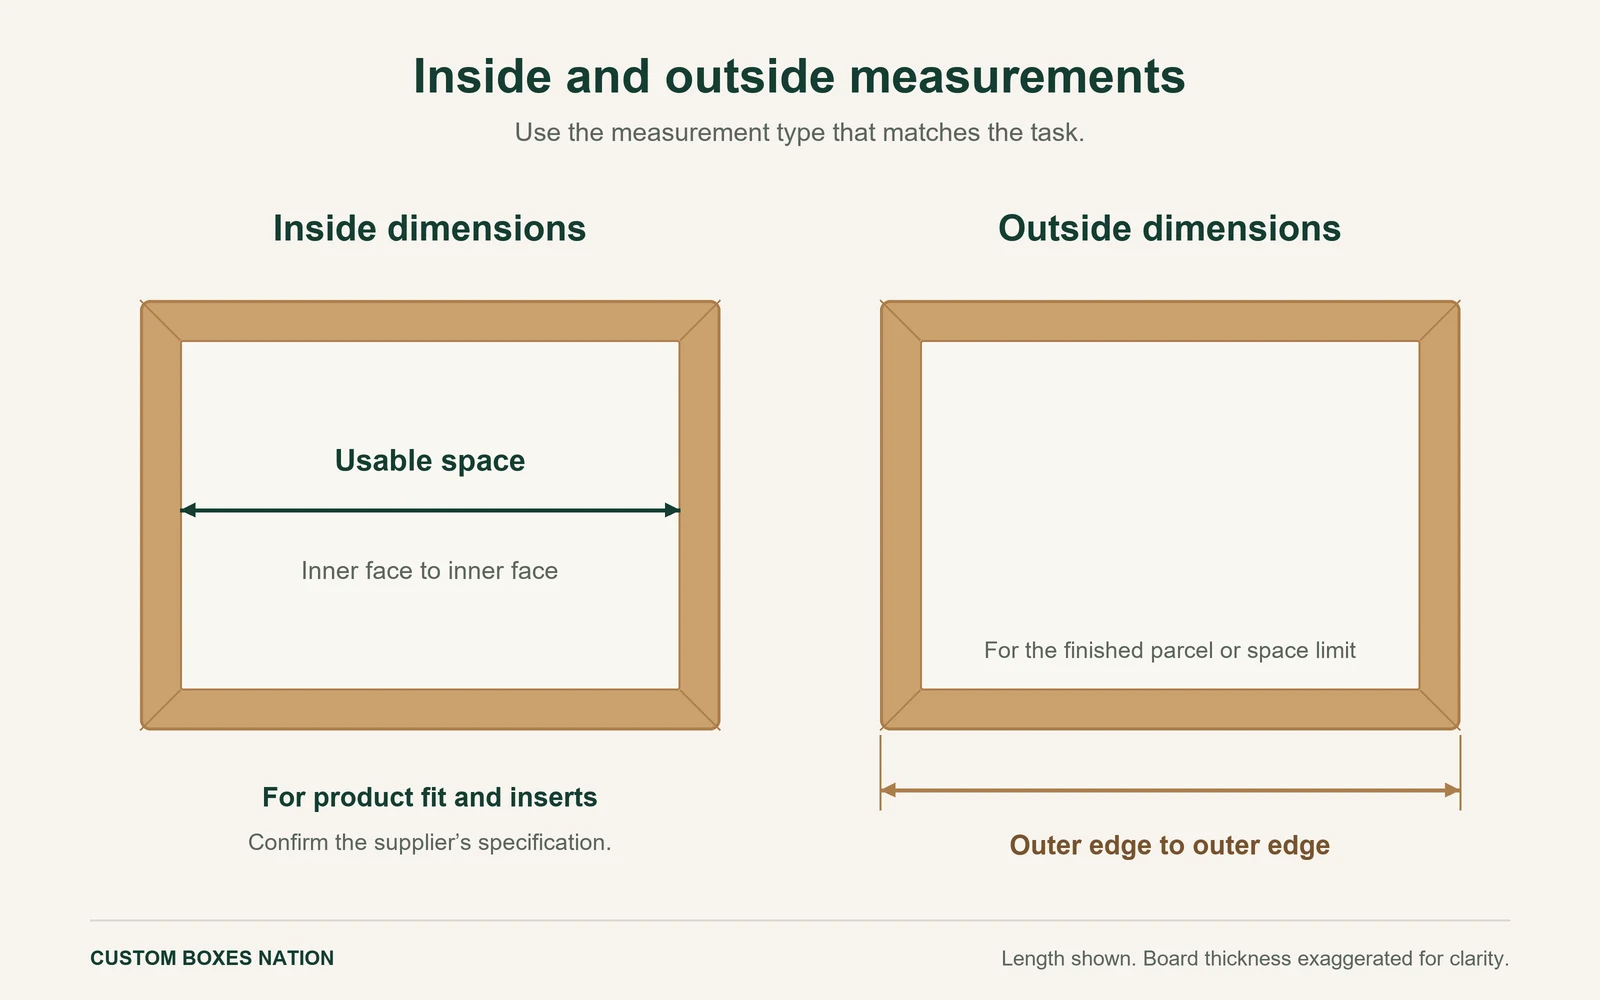
Do not calculate the inside size by subtracting an assumed wall thickness from the outside. Folded edges, overlapping panels, lid construction and inserts can change the usable space. Measure it directly or confirm it against the supplier’s specification.
For custom mailer boxes, check the product with the lid closed. Tuck flaps and folded side walls can occupy space that an open-box measurement misses.
How to Measure a Shipping Box
Pack the contents, add the protective materials and close the box exactly as it will travel. Then measure the outside length, width and height at the furthest points in each direction. Include bulging walls or an uneven closure rather than measuring only a neat corner.
Carrier labels may differ from the orientation you used to specify the box. For example, UPS identifies the longest side of the package as its length. Check the instructions for your chosen carrier and service before entering dimensions or applying rounding.
Do not use the empty box’s printed size as a substitute for measuring the packed parcel. Also weigh the parcel separately; box measurements do not establish its actual weight. Shipping charges can depend on package size as well as weight and service conditions.
When ordering custom shipping boxes, keep your required internal fit separate from the external measurements needed for shipping.
How to Measure a Package
A package includes everything being sent: the product, its packaging and any outer wrapping. Measure the finished parcel rather than the product alone.
For a filled bag, measure its actual packed shape without flattening it. For an irregular item, imagine a rectangular box enclosing it and measure between the furthest points along three perpendicular directions. That approach is also described in UPS guidance for irregular packages.
Include projecting handles or other protrusions when identifying the full size. Unusual shapes may have additional packing or acceptance requirements, so confirm those with the carrier before booking.
Common Box Measuring Mistakes
Changing orientation halfway through. Identify the opening and base first. Turning a tall box onto its side can swap height with another measurement without anyone noticing.
Measuring a crushed carton. A distorted sample is a poor reference for a new order. Use an undamaged assembled box, or tell the supplier that the sample is damaged.
Letting the tape sag or run diagonally. A diagonal measures farther than a straight side-to-side reading. Keep the tape aligned, without pulling hard enough to bend the walls.
Rounding before recording the result. Save the measured values first. Follow the relevant rounding instructions afterward, rather than guessing that a fraction will not matter.
Forgetting packaging around the product. Tissue, lids, protective sleeves and inserts all take space. Measure the complete packed arrangement, not just a bare product.
Why Accurate Box Measurements Matter for Custom Packaging
An overly tight box can make packing difficult or prevent the lid from closing. An oversized one can leave unwanted movement and require more void fill. Fit and protection also depend on the material, construction and insert design, so dimensions alone cannot confirm performance.
For corrugated boxes, discuss the packed weight and handling conditions alongside the size. The board specification needs to suit the job.
Accurate dimensions also give the artwork team a defined structure to work with. Panel sizes, folds and closures affect where printing can go. Check artwork against the supplier’s final dieline rather than treating your first measurements as an approved production drawing.
If you are planning custom packaging boxes, share the measured product, the proposed inside box size and any inserts together. Ask for the fit to be checked with an appropriate sample before committing to production.
Quick Box Measurement Checklist
- Assemble the box and identify its opening and base.
- Decide whether you need inside or outside measurements.
- Measure length, width and height with the tape straight.
- Allow for the actual wrapping, inserts and closure.
- Record L × W × H, units and measurement type.
- Recheck the readings and confirm any supplier or carrier instructions.
Frequently Asked Questions
How do you measure a box?
Assemble it, identify the base and opening, then measure length, width and height. Use inner faces for usable product space and outer faces for the finished parcel size.
What is the correct box dimension order?
The usual order is length × width × height. Check the supplier’s labeled drawing if a particular box uses depth or a different orientation.
How do I measure a shipping box?
Measure the outside of the packed, closed box at its furthest points. Check your carrier’s requirements for identifying the dimensions and rounding the readings.
How do you write the dimensions of a box?
Write all three measurements with their units and order, such as 12 × 8 × 6 inches (L × W × H). Add “inside” or “outside.”
Do you measure the inside or outside of a box?
Measure inside for usable product space. Measure outside for the finished package size or an external space limit. Confirm which measurement a supplier or form requests.
How do you measure a package?
Measure the complete parcel as it will be sent, including wrapping and protrusions. For an irregular shape, check the full enclosing dimensions and the carrier’s guidance.